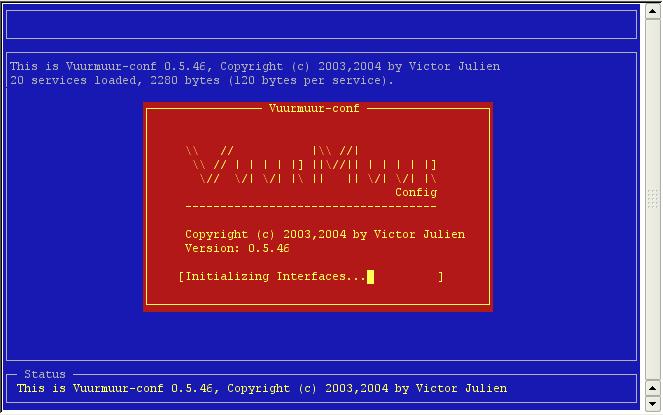
The startup screen.
This document provides the details for the actual use of Vuurmuur. Make sure you read the section on the 'Main concepts', and understand them. They are central to this program. If you run into problems please contact me at the vuurmuur-users mailinglist (archive).
For the installation a separate document is available on the website: installation guide.
A zone is a container for networks. It can contain unlimited networks. Currently a zone does not have much more use, however this will change in the future. A zone can be active or inactive. For an inactive zone no firewall rules are loaded into the system.
Zones are meant to group similar networks together. For example, if you have two networks in your office, say sales and accounting, you would create a zone 'lan'. In this you would create the two networks.
Networks are definition of your networks, and containers for hosts and groups. Attached to a network are interfaces. As with the zones, a network can be active or inactive. The name of a network is always 'networkname.zonename', where zonename is the zone the network belongs to.
Hosts are definitions for individual hosts. They two can be active or inactive. A host consists of an ipaddress and an optional macaddress. A hostname is always 'hostname.networkname.zonename'.
Groups are collections of hosts. The members in a group can only be hosts, and can only be hosts from the network the group belongs to. This prevents accidents. A groupname is always 'groupname.networkname.zonename'.
An interfaces is a definition of a network-interface. Supplied must be the ipaddress of the interface and the system interface (e.g. eth0). The ipaddress can also be dynamic. Vuurmuur will try to read it from the system.
A service is a container of portranges, so for complex services like Samba and Nfs, creating rules is especially easy. A service can be active or inactive, so disabling all traffic for a specific service is very easy.
Tip: Don't make names too long. If you run Vuurmuur_conf on a small screen or on the console, the screen width is limited. It also will make reading logfiles easier.
Rules combine this all. Rules are designed to read like a correct English sentence. For example: 'accept service http from localnet.lan to internet.ext'. Lets dissect this rule. We start with the action. Possible options, other than accept are drop, reject, queue (to userspace), log, portfw, snat, masq and redirect. After the action we see the service. This is a service that is defined by the user. The keywords 'from' and 'to' are used to define the source and destination of the rule. Here the administrator can select the networks, hosts and groups that he/she defined. There is one special zone: 'firewall'. This creates incoming and outgoing rules, all others will be forwarding rules.
The term middle-end may be a bit confusing, so i try to explain. Vuurmuur is a program that converts a number of configuration files into a ruleset for iptables (the back-end). Vuurmuur_conf is a tool to configure the Vuurmuur configuration. So i call that the front-end.
Vuurmuur can be run in several ways.
as a daemon, ready to apply new rulesets.
once, loading the ruleset and then exitting.
in bash-mode, printing a bash-script to stdout
The first way is the intended way, however the others can be useful as well.
Commandline options:
-b gives a bashscript output
-d [1 – 3] enables debugging, 1 low, 3 high
-h gives help
-V gives the version
-l vuurmuur starts and goes into daemon-mode.
-v verbose mode.
-n for use with -l, it goes into the loop without daemonizing.
So normally you would want to start Vuurmuur with 'vuurmuur -l'.
Note: vuurmuur must currently be started with the full path
e.g.: '/usr/local/bin/vuurmuur -l' instead of just 'vuurmuur -l'
Vuurmuur will respond in a nice way on two signals: SIGHUP and SIGINT. In the first case the configuration, data and rules will be re-read, and the rules will be loaded again into the system. On a SIGINT vuurmuur will quit cleanly.
When in daemon-mode Vuurmuur sets up a shared memory segment. Vuurmuur_conf tries to connect to this. Vuurmuur_conf can talk to vuurmuur trough this, and tell vuurmuur to reload. It will receive feedback from vuurmuur, which is not the case when sending a SIGHUP.
Start Vuurmuur_conf by typing 'vuurmuur_conf' on the commandline.
The
startup screen.
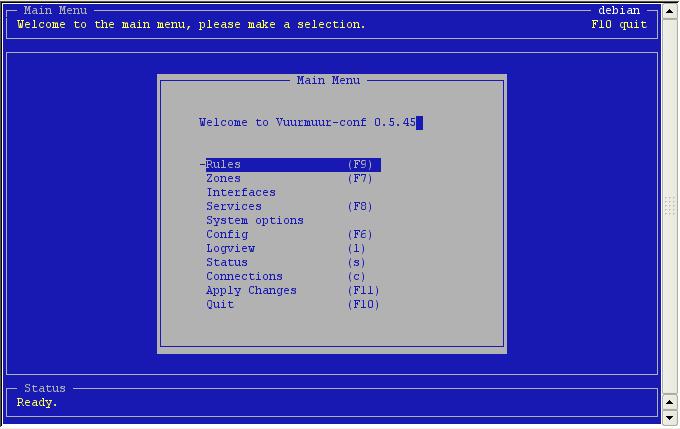
The
main menu.
The configuration can be managed from inside Vuurmuur_conf. Go to the 'Config'. Here you can choose between 'General' and 'Logfiles'.
First 'General'.

First
you see the plugin that is used for Services, Zones, Interfaces.
Currently only 'textdir' is supported, but maybe in the future also
mysql or an other database will be supported.
Next is the directory where the plugins can be found.
Below that the location of the rulesfile must be specified. This is the file where the traffic rules are stored.
At the bottom the location of the iptables command and the ipconfig command need to be given.
Now the Logfiles.

Vuurmuur.log
is a general log, containing the same infomation as is printed to
stdout when in verbose mode. Debug.log contains debugging
information, and can grow very rapid when using the debuglevel
commandline options. The Error.log is a special logfile for errors,
so you can easily spot them (errors are also printed in the
vuurmuur.log). Finally the Traffic.log is the log that contains the
firewall logs.
The loglevel can be used to tell syslog which logfile should be used. This is very useful if you don't want your /var/log/messages or /var/log/syslog to be flooded by the firewall.
Finally the systemlog is the log where vuurmuur_log reads the netfilter log, which it converts to vuurmuur logs, and then stores them in the traffic.log.
Go to the Services Section. There will be a list of services.
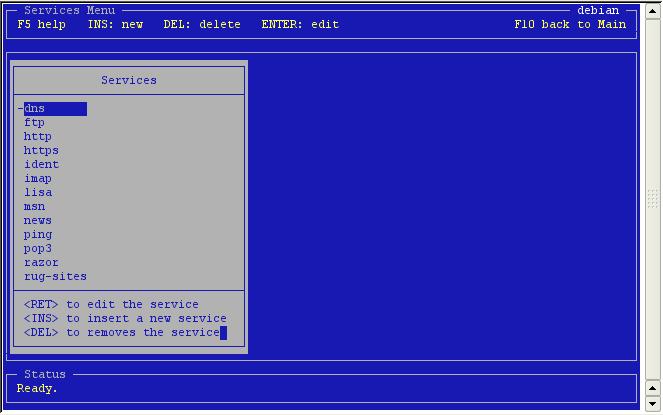
Press
Insert to add a service.
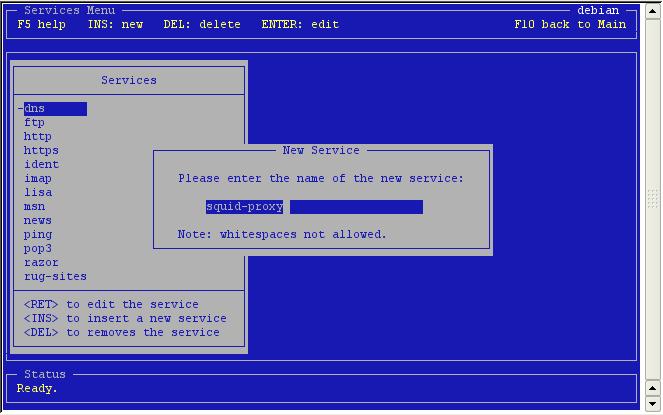
Enter
the name of the new service and press enter.
![]()
Next
you will see this, an empty service.
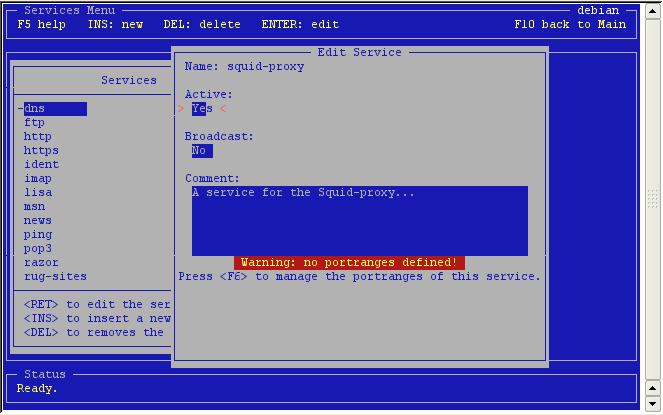
Set
the service to active and make an optional comment.
See the warning about no portranges? Press F6 to go to the portranges.
![]()
Empty
indeed. Press Insert to add one.

After
selecting to protocol, you can enter the ports here.
Note: press enter after all input.
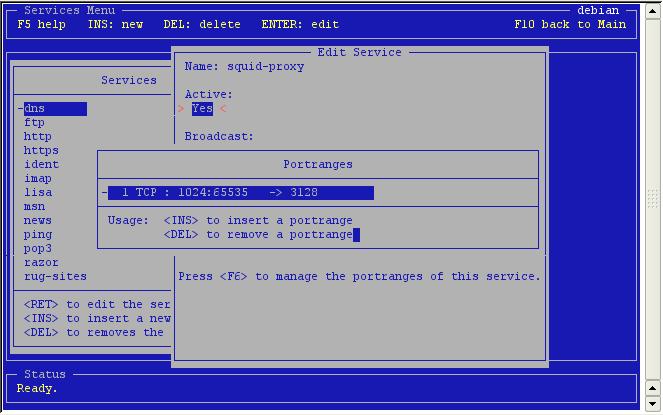
Now
it's in the portrange list.
Press F10 to go back to the services list, and you will see that the new service is now in the list.
Please
note that any change to the interface in Vuurmuur will not affect the
interface in your system.
The
data in vuurmuur will only be used inside Vuurmuur for
creating rules!
From the Main Menu go to 'Interfaces'. Here you will see a list of the interfaces you already defined.
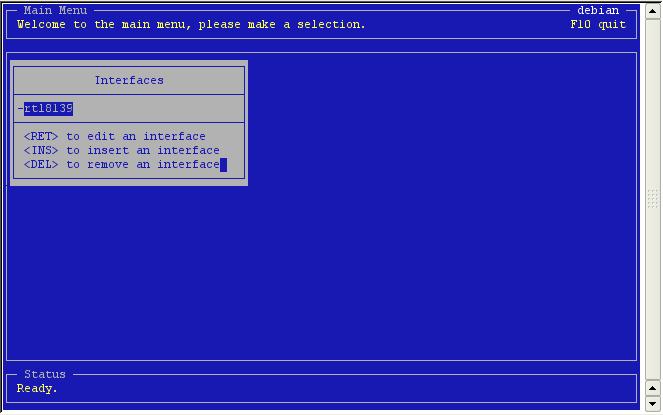
Press
'Insert' to add a new one.
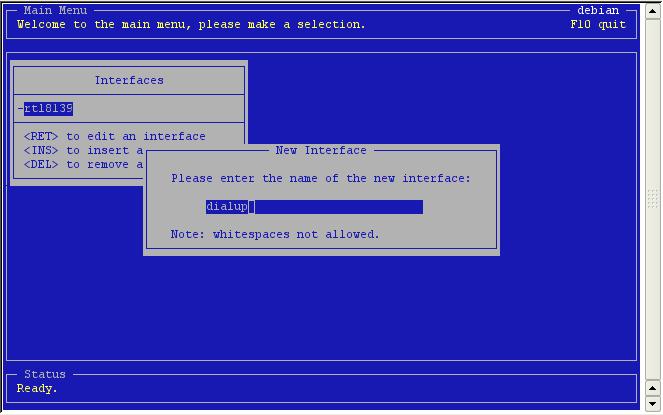
Let's
call this one 'dialup'.
![]()
Here
you see an empty interface.
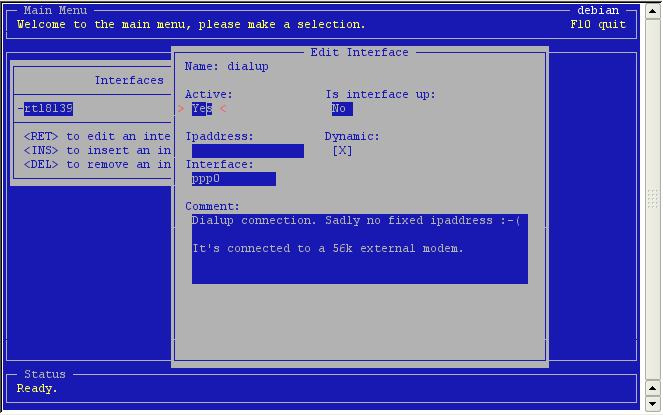
In
the interface inside the interface the system interface must be
supplied. The ipaddress is either fixed or dynamic. In the latter
case, toggle the dynamic option. Otherwise, enter the ipaddress of
your interface.
That's it!
Go to the Zones Section. You will get a list of your current zones.
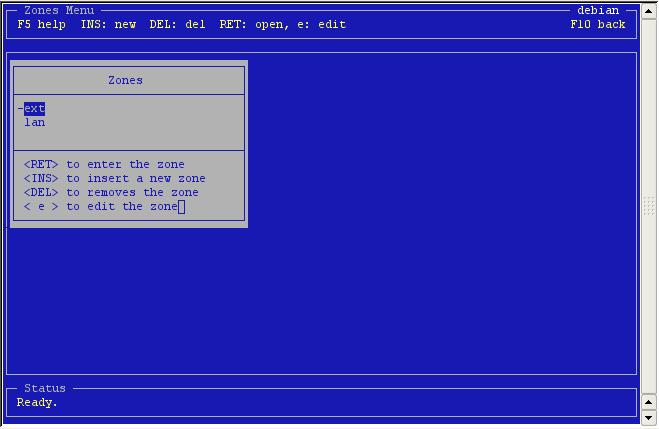
Hit
<insert> to add a zone.
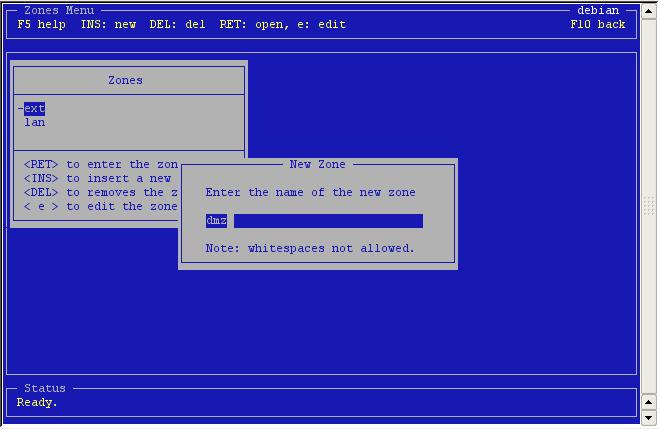
We
call ours 'dmz'.
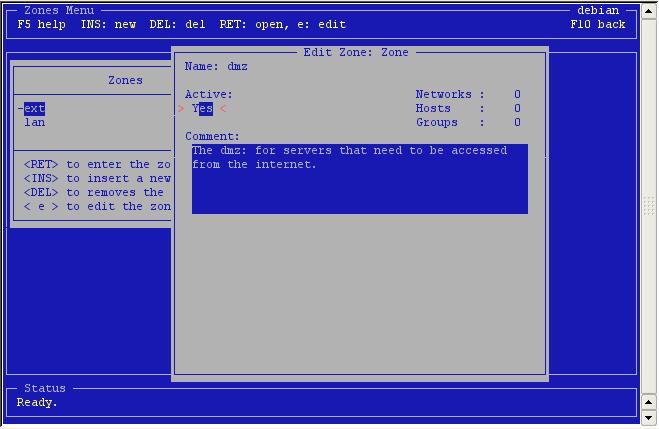
Configuration
of a zone is easy. You can only activate or de-activate it.
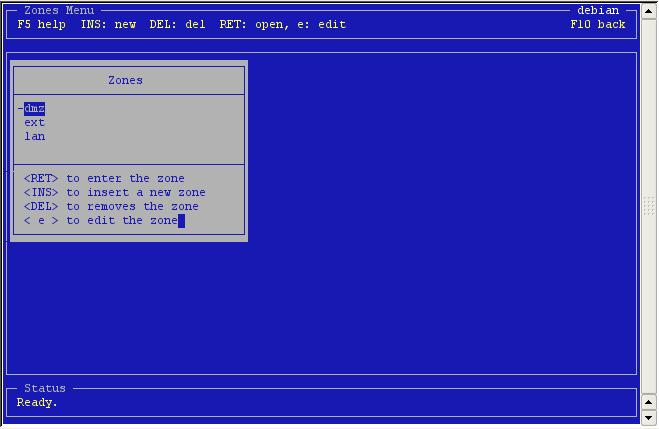
And
here you see it's now in the list.
A zone is not very useful without at least one network in it. So lets create one.
Enter the zone 'dmz' by pressing <enter> on it.
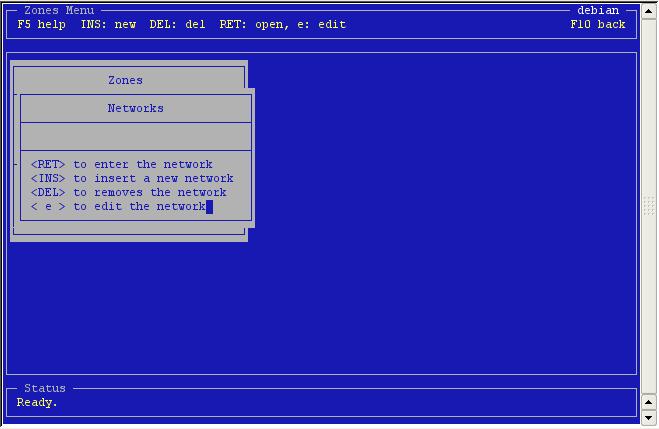
No
networks yet. Press <insert> to add one.
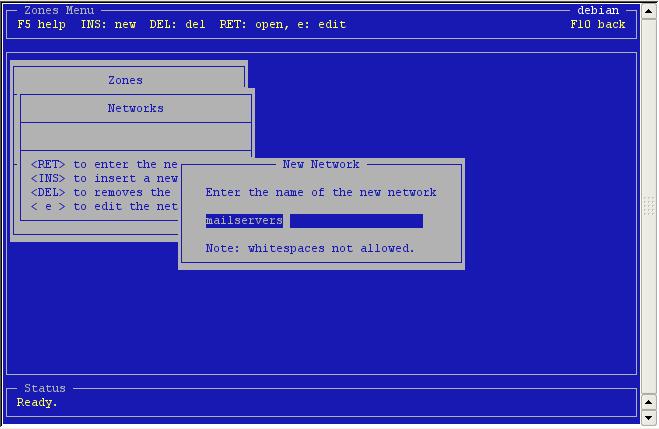
We
are added a dmz for our mailservers so that's the name it's gonna
get. Note that the fullname of the newly created network is now:
'mailservers.dmz'.
![]()
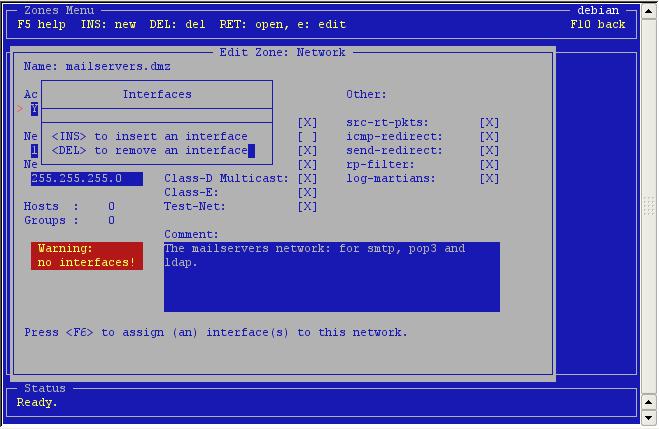
Wow,
that's a lot of options! At the network you supply the network
address, here i chose 10.1.0.0. The netmask should also be set. I
chose 255.255.255.0.
The anti-spoofing options can all be set, except for the Class-A because our own network would be blocked by it. The other options can normally all be checked.

That
looks better, however notice the warning? A network needs an
interface. Press <F6> to add an interface.
As
expected, no interfaces. Press <insert> to add one.
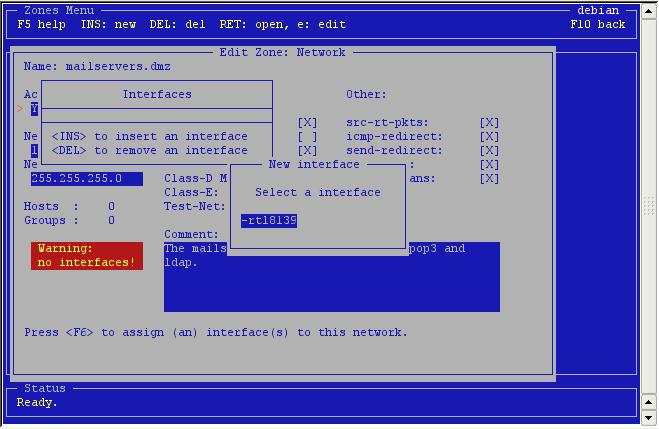
Only
one on my system, so that's an easy choice. Note that you can add
more than one interfaces to a network if you want.

Well,
finally you see the new network in the list.
The dmz can now be used, however you probably want to add hosts as well, so you can use portforwarding. Also, this will result in clearer logs.
Go to the Networks and press <enter> on the 'mailservers'-network.
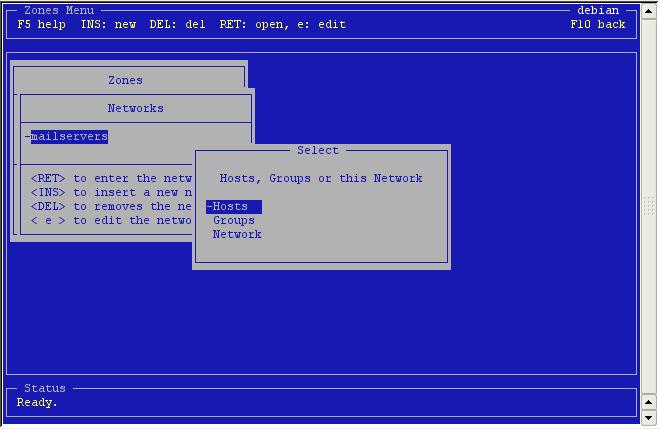
You
can go to the hosts, the groups or edit the network itself. Select
hosts.
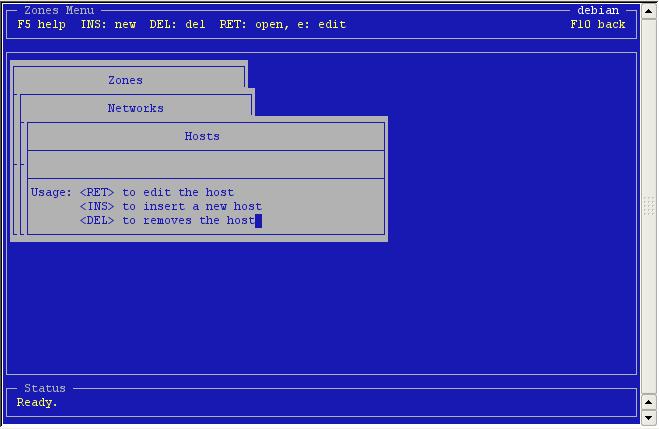
Still
empty. Press <insert>.
![]()
The
empty host. You need to supply an ipaddress that fits in the
network/netmask-combination of the network. Note that if 'virtual' is
set to yes the host will be seen as a virtual interface of the
firewall-host.

That's it.
Groups can be added by selecting 'Groups' in the network.

Press
<insert> to create a new group.
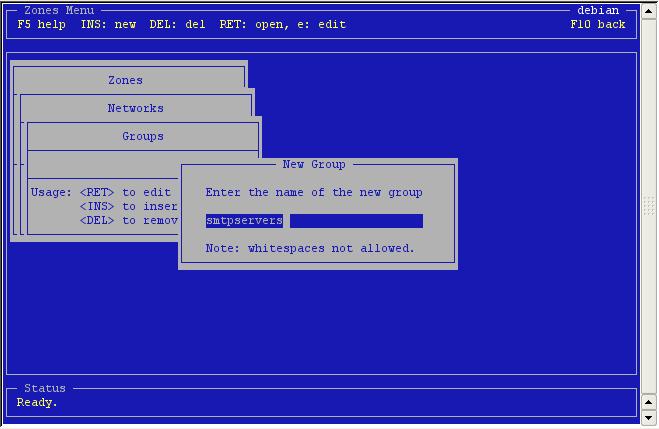
Enter the name. Note that it's recommended to chose a name that reflects
the fact that it's a group.
![]()
An
empty group.

See the warning about the lack of members? Press <F6> to assign
members to this group.
![]()
Empty
indeed. Press <insert> to add a member.
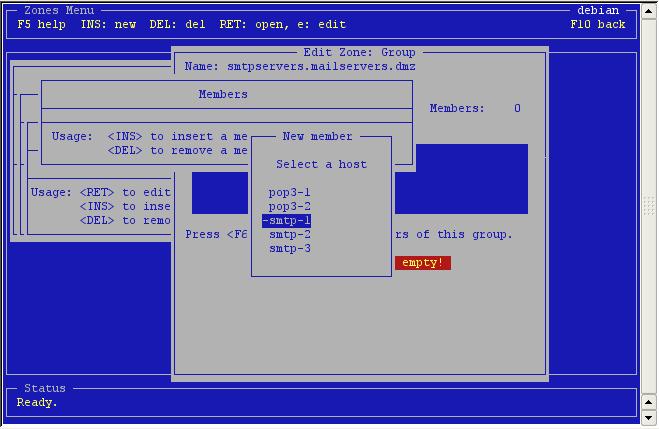
Select
one and press <enter>. Repeat this for all members you want to
add.

This
is the result.

In the grouplist you can see the newly created group.
TODO